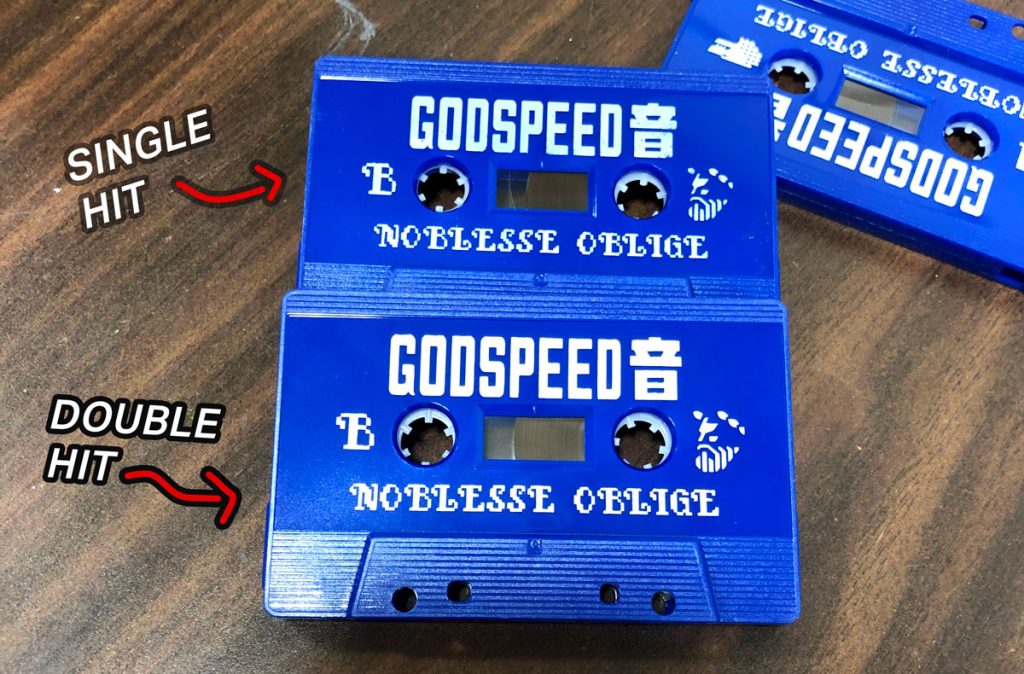
Longtime users of our outstanding cassette duplication services have no doubt noticed that a “double hit” option appears when selecting pad print artwork. We often receive questions from clients asking what “double hit” pad print entails and when it’s appropriate for their artwork. Here’s a breakdown:
“Single hit” and “double hit” applies to how many times we machine-stamp the cassette with your artwork, “single hit” being the standard. So as you may have already surmised, applying a double hit stamp will give your ink colour more opaqueness and vibrancy. This is especially important when you’re stamping a light ink color on a dark color cassette shell, such as white ink on a black cassette. The more, the better.
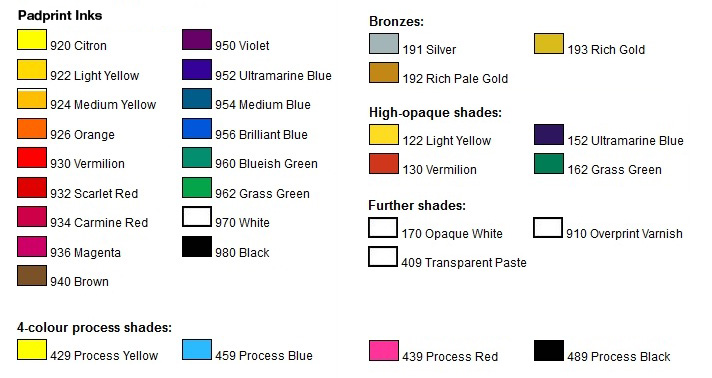
There are a couple of caveats to this approach. First, since more ink is laid down, thin lines may appear thicker or narrow gaps between the artwork may be filled with spreading ink. If you have thin lines in your pad print artwork, you may want to forego a double hit. Secondly, there are a number of inks that aren’t particularly opaque to begin with, and a double hit won’t change the ink vibrancy against a dark cassette shell. These inks include Brilliant Blue, Magenta, Yellow Lemon Citron, and Violet. (Orange is also not very opaque when used with single hit, but actually benefits greatly with double hit.)
The solution here isn’t to just settle with single hit, but to request a white base layer instead. Let’s say you want magenta against a black cassette shell: we will first lay down your artwork using white ink, and then again using magenta ink. This allows the magenta to pop out and shine against the black cassette shell as if you were printing it on a white cassette shell. White base layers are available by special request, at $25 CAD plus $.18 per hit, allowing for much more vibrant pad print at a low individual cost increase.
If you release your cassettes DIY style, then you’re surely no stranger to our blank printed material. From sticker labels to blank J-cards, Duplication.ca provides you with the sheets and templates needed to turn your home setup into a printing press.
Every now and then we receive a question on our live chat service asking for help with printing at home. We thought it would be a good idea to run through a short list of helpful tips to make your DIY experience a smoother process!
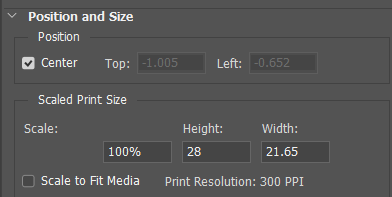
When designing or readying for print, do not crop or resize the template, or stretch the template to fit your artwork. It’s important that the template is printed as is, so that includes the settings in your printing options.
You will want to make sure that the scale is set to 100% under ‘Scaled Print Size’, and ‘Scale to Fit Media’ is unchecked.
Add Bleed and Title Safety to Your Image
Consumer printers are prone to misalignment and movement. The cheaper the price and build of a printer the more it will shake when printing, meaning precise down-to-the-millimeter print alignment may not always be possible. This is why you add bleed to your image, so if there is slight movement you won’t be treated to an ugly white line of empty space. A hairline of empty space may go unnoticed by a good number of your fans but it will absolutely drive you crazy knowing it’s there! The standard bleed amount is an extra .125” of image from the template line.
Same goes with a title safety area. You shouldn’t be placing text right at the edge of the template lines, because if there’s any movement you’re risking the text being partially cut off. Suddenly your solo noise project RAT LOTION reads as AT LOTION, and your labels are ruined!
My Printer is a Hunk of Junk and it’s Not Working!
If you still find that there’s significant misalignment, one trick is to move the artwork in your photo editing software to make up for the shifting. That may be tricky and take a few tries, which is why we recommend ordering extra sheets for tests and contingency.
Your local print shop is surrounded by printer issues day and night, so they will likely understand what you’re trying to accomplish. Drop off your sheets and your files on USB and they can give it a shot.
Duplication.ca’s pressing plant is working around the clock to get your print orders looking bright and gorgeous. If you want to keep it DIY, hit us up on our live chat (the green bubble on the bottom right corner of the Duplication.ca website) and let us know your issues, we’ll do our best to help. If you want high quality printed products without the pain and anguish of your 12 year old Canon printer spouting errors, we can print your J-cards, stickers, and all other material using our high quality digital press (or ultra high-quality offset press) with thick and durable cardstock.
A true joy of working at a music plant is having a top-down view of what’s going on in underground music all across the world. Everyday I give myself a moment to grab a random cassette or CD and check out what’s on it, learn a bit about the band, maybe get a sense of what the punk scene is like in Winnipeg or club culture in Minneapolis. Here are a few choice albums I had the pleasure of being introduced to this past month!
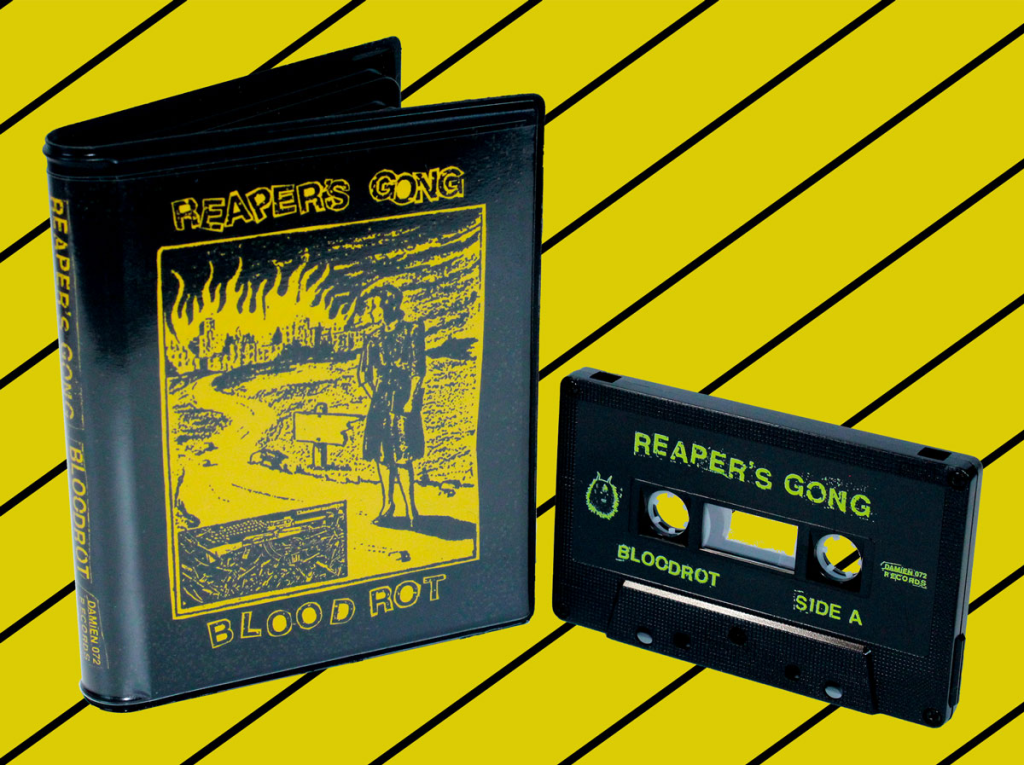
Reaper’s Gong – “Blood Rot” c8
For an EP on the shorter side, Blood Rot moves slowly. Riffs hit heavy and hard, but the impact lingers like a bruised arm. Brainbombs guitar with Ukiah Drag monotone vocals, an absolute must for the noise rock fist-pumpers. The compact but hefty “rave case” packaging is a good metaphor for how much destruction you’ll get from a small package.
An electronic EP that hides all the beats and rhythms, burying the sound under dense atmosphere in the same vein as Gas. Muted piano melodies seem to land as if by chance, fingers hitting keys with nonchalance but instinctively creating haunting melodies.
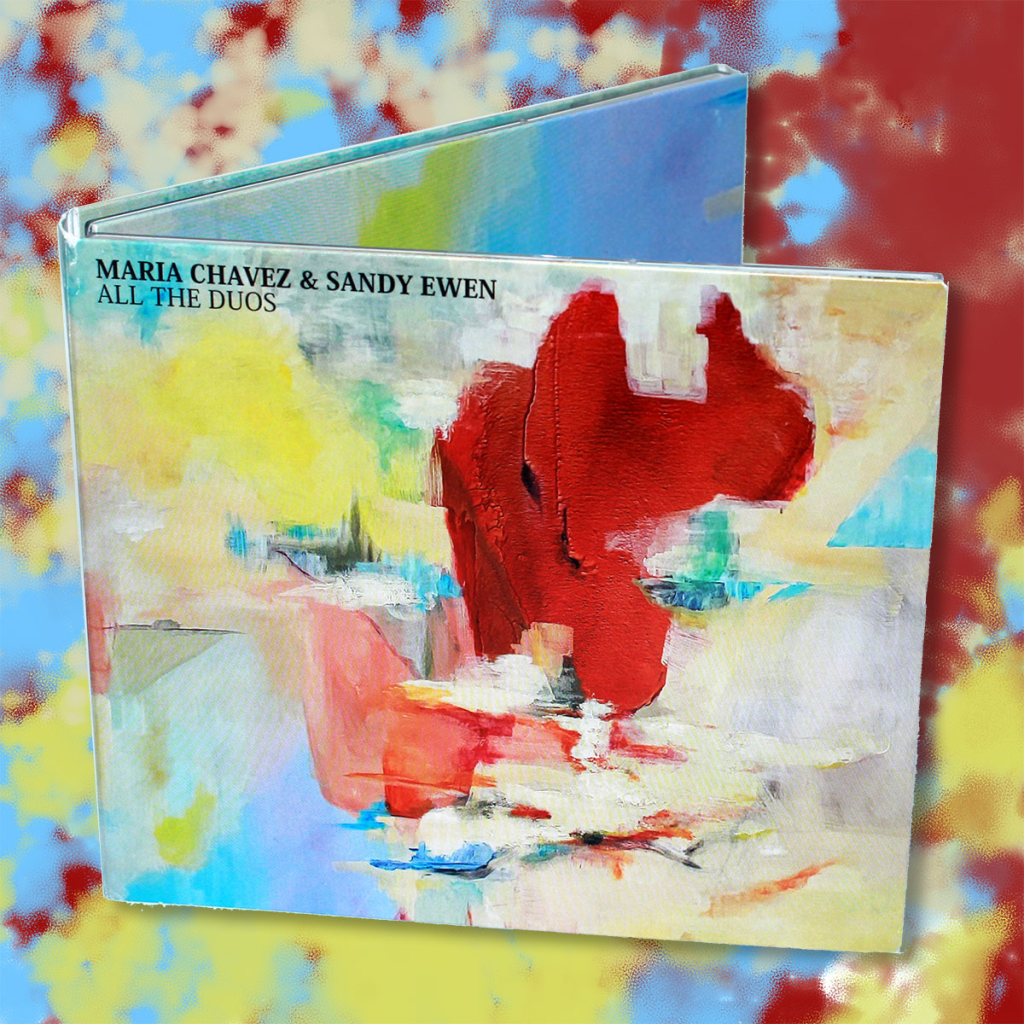
One for the true avant-gardists, those who think that Keiji Haino may be a little too middle-of-the-road for their tastes. A double-disc set with over 90 minutes of sound art compositions, All the Duos is a heavily textured battle between collaborators. The two aren’t performing with each other as much as they are against one another, with every scratch of a string met with a hand smacking the body of a guitar.
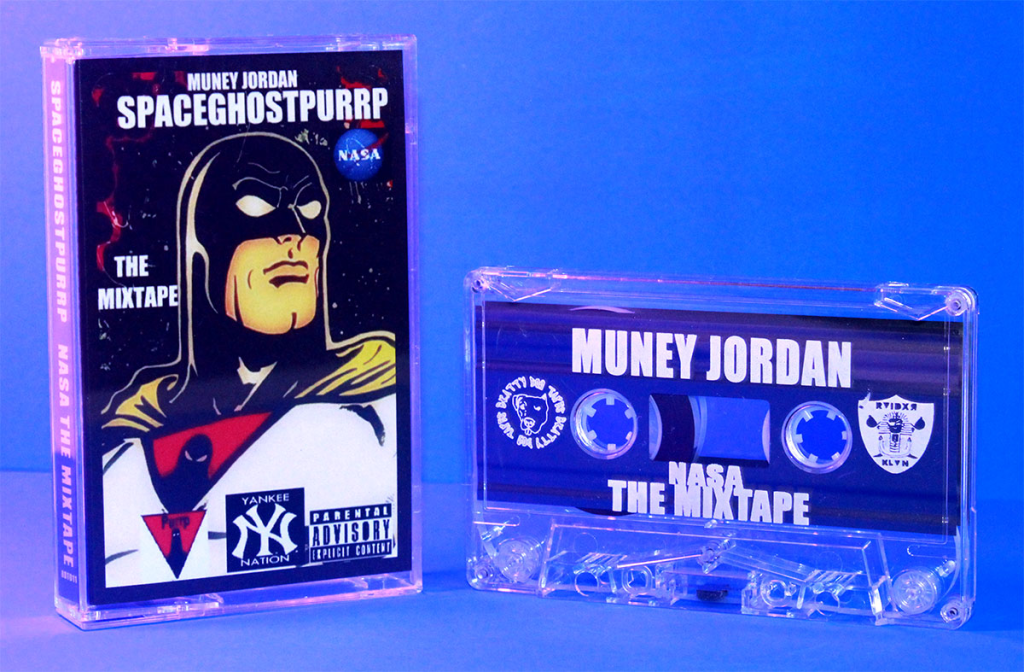
Hard to believe it’s been over a decade since this mixtape appeared seemingly out of nowhere. SpaceGhostPurrp and the Raider Klan breathed new life into underground hip hop— trillwave production, oddball reference points, lo-fi aesthetics and the blogosphere distribution were completely game-changing, but the music hasn’t aged a day. Still odd, still dope.
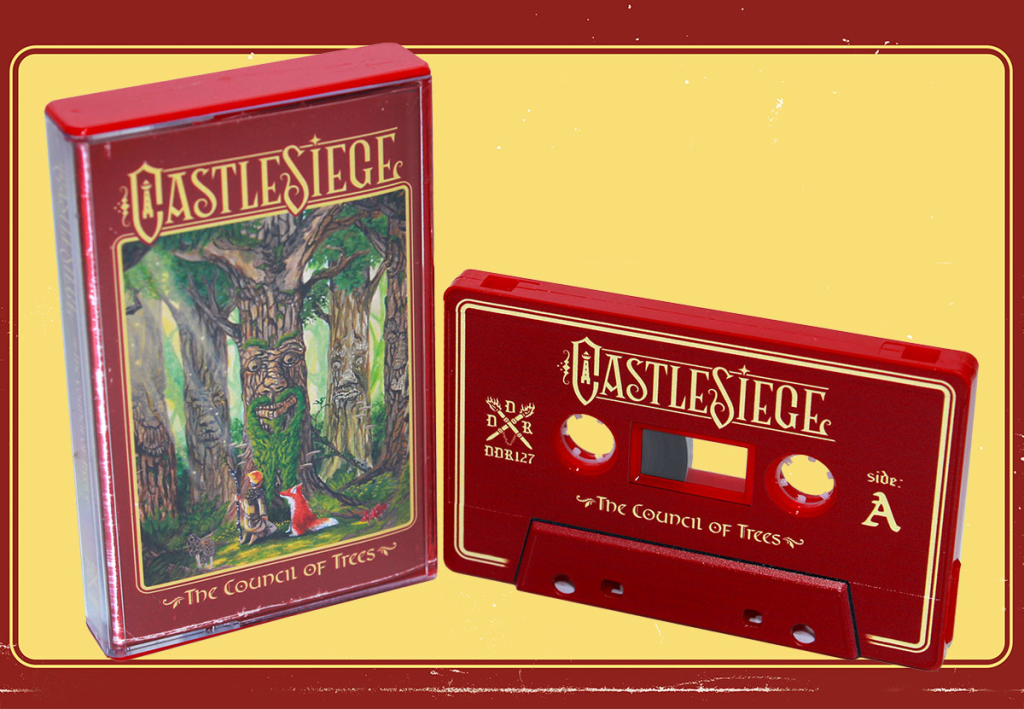
An instrumental story of a healer and his fox companion as they travel through mystical terrains, meeting unique and perhaps untrustworthy characters along the way. An album immersed in the atmospheric essence of point-and-click Sierra adventures, unfolding a narrative where the deeper you venture into the woods, the more ominous the shadows within the forest grow.
We turn the spotlight on underground music releases manufactured at Duplication.ca several times a week over on our social media channels, including TikTok and now Bluesky. Give us a follow using the links below, and if you have an album that you ordered through us that you’d like to bring to our attention, just send us a DM!
Do you want even more affordable printed J-cards, faster to your door, without having to skimp on quality? Unbelievably, Duplication.ca can provide that for you! Introducing our Automated Print products:
The Automated Print items work similarly to the standard online shop system, but instead the artwork is uploaded through our Online Designer. This allows you to design your artwork in-browser without the use for an expensive graphic design suite, or simply drag ‘n drop your pre-existing artwork into the Online Designer. After checkout your artwork is automatically sent to the printer queue, with zero hassle in between! Not only does this mean your J-cards will be printed, scored, and shipped quicker, but it also saves pre-press time on our end. We pass those savings on to you, making the J-cards even cheaper than our regular print pricing.
Using the online designer is remarkably simple, you can review the guide we wrote up a couple of weeks ago. Just remember to extended the artwork past the template lines, and to double-check your work as to ensure your artwork appears as intended! You will need to approve your artwork once more after checkout, which serves as a final opportunity for a quick inspection.
All these benefits without having to compromise on quality! The J-cards are professionally printed using Cougar™ Super Smooth stock— 80lb smooth cover at 216 GSM. Double-sided printing is included in the price, with bright and vibrant colours on durable paper.
When sending us artwork for print, it’s necessary to add bleed to your image. For those who are not familiar, bleed is the area that goes past the template or trim lines. Failure to include bleed in your artwork may result in the possibility of small, unprinted edges appearing if there is any shift or movement in the printing press during the printing process. Yup, this is true even with massive professional printers that are big enough to take up a whole room. The fix is to add a bit of artwork beyond the template or trim lines, that way if there is a slight movement it will be imperceptible in the final printed image.
Some templates may already have bleed or “cut” lines! If so, you can simply fill the image up to the bleed lines.
How much artwork bleed should I add?
All you need to do is add about 0.125″ or 3.5mm of bleed to your artwork. If your artwork background is white or transparent, you don’t need to worry about bleed.
What’s the difference between bleed and the type safety area?
While the bleed is to supposed to extend beyond the trim or template lines, a title safe area is a way of ensuring your text won’t be cut off when printing. What’s the fix? Don’t place text or logos right up to the edge of the image. Make sure text is a minimum of 0.125″ away from the template/trim lines.
Show me an example of bleed.
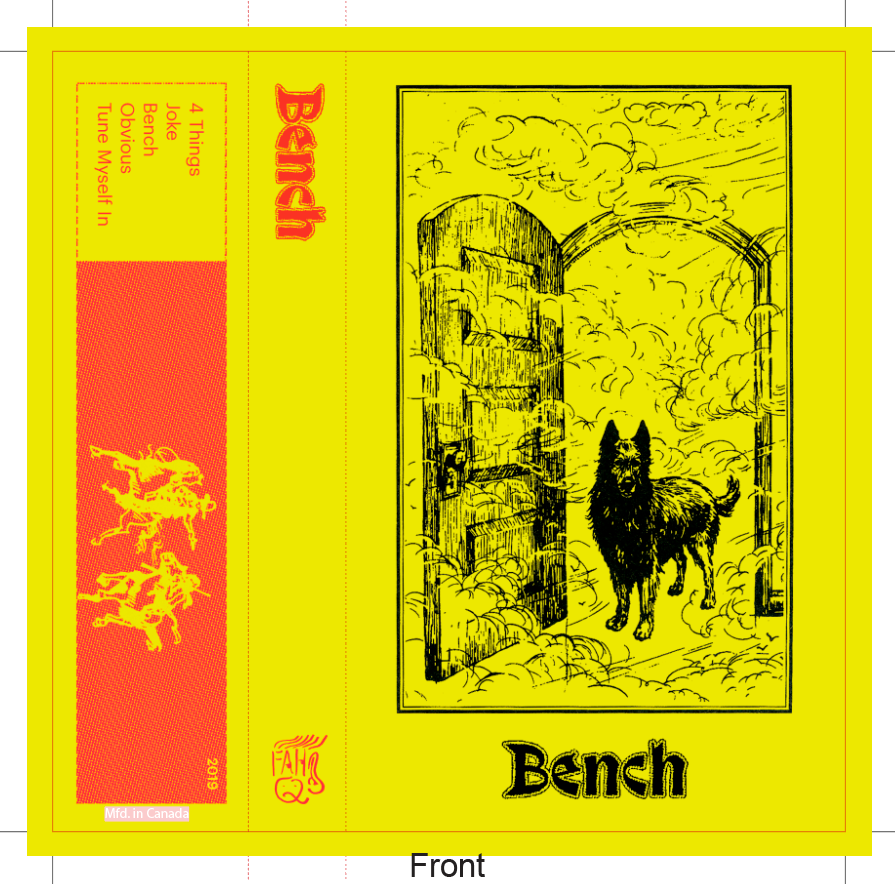
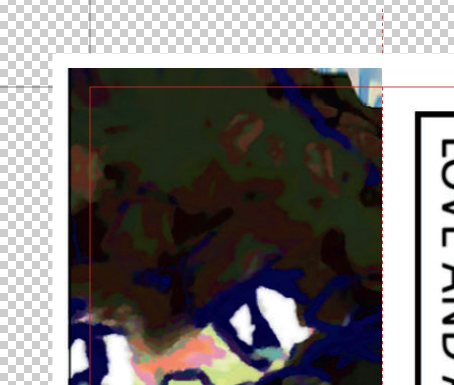
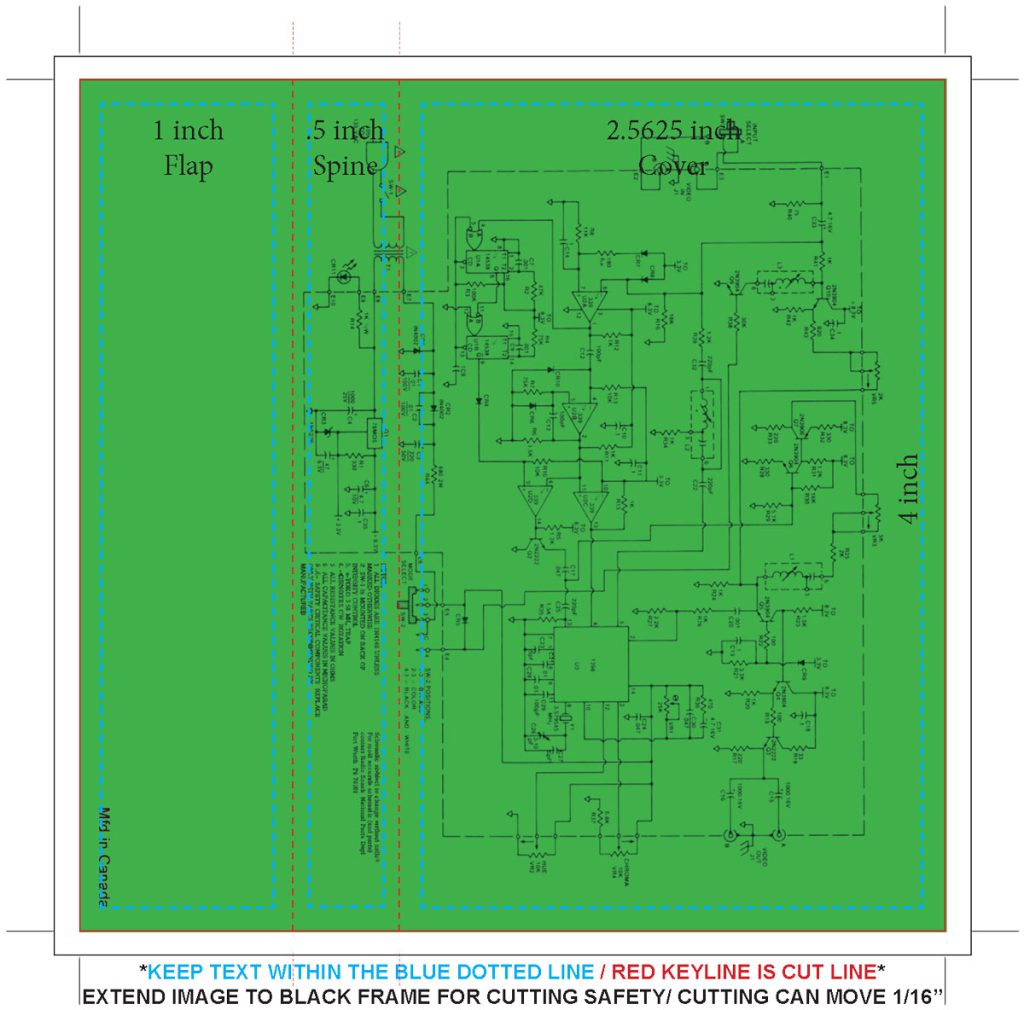
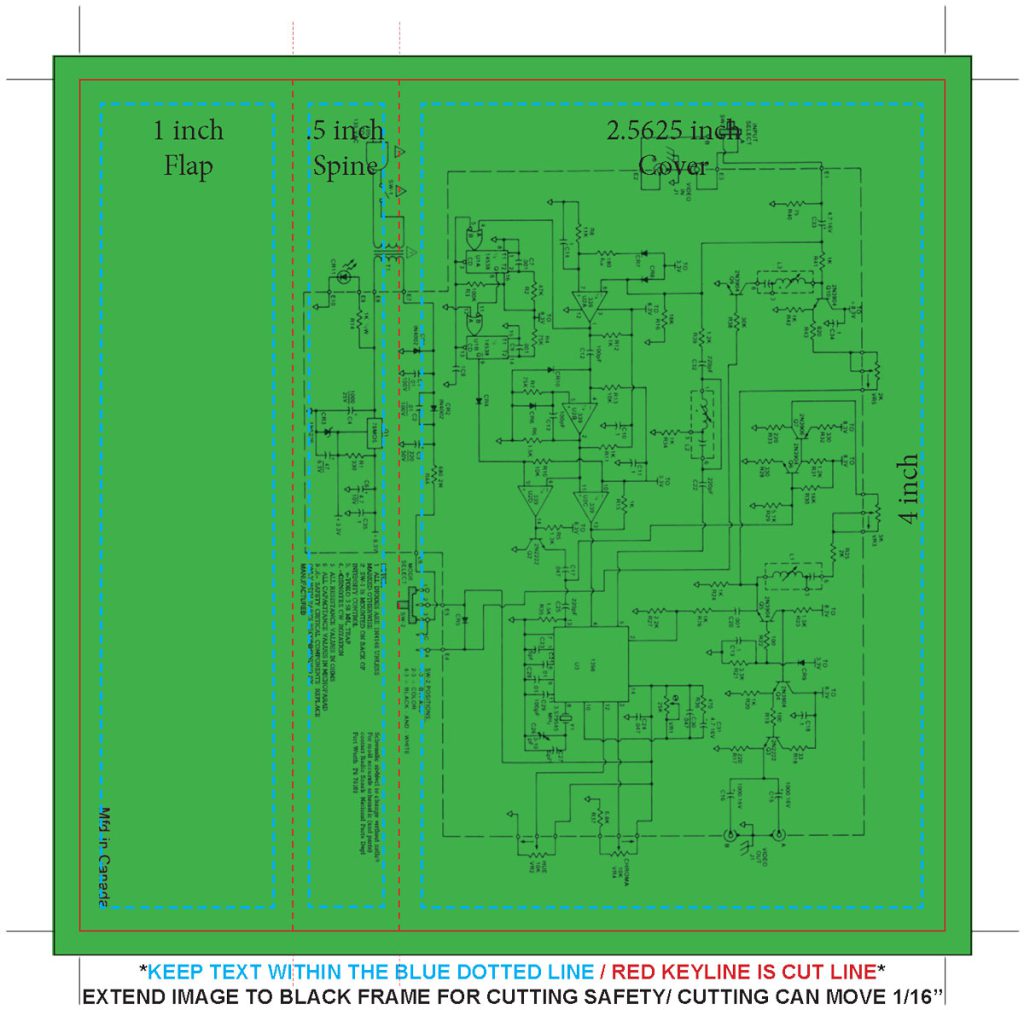
Okay, so let’s start with an example of the wrong way to submit artwork:
This J-card template has the image correctly placed in the title safe area, but you can see the green background doesn’t extend past the trim line. The J-card template includes an additional black box for bleed, but since the designer left it empty there’s a risk of white edges when printed and trimmed.
Here’s the correct way to submit artwork:
See how the artwork is extended ~3.3mm beyond the trim box? Now we know for certain that there won’t be white edges after trimming.
Added RECYCLED white cassette labels. SKU CASS-LABELREC
This new label variant is made with recycled paper. It’s a bit less bright than the standard label stocks. Available in the online shop and with duplication orders.
SKU12894 C-10 Magnolia SW (Tabs-OUT) loaded with HI-FI Tape SKU12888 C-10 Transparent with Grey Liners (Tabs-IN) loaded with HI-FI Tape SKU12904 C-11 Clear with Black Liners (Tabs-Out) loaded with Fox Tape SKU12893 C-15 TINR Black (Tabs-OUT) loaded with Fox Tape SKU12889 C-16 Red Tint with Screws (Tabs-OUT) loaded with HI-FI Tape SKU12891 C-19 Smoke Tint Sonic (Tabs-OUT) loaded with HI-FI Tape SKU12892 C-20 Blue Tint Sonic (Tabs-OUT) loaded with HI-FI Tape SKU12902 C-22 Smoke Tint Sonic (Tabs-Out) loaded with HI-FI Tape SKU12903 C-33 Clear with Black Liners (Tabs-Out) loaded with Fox Tape SKU12896 C-38 Clear with Black liners (Tabs-Out) loaded with hi-fi Tape SKU12897 C-41 White matte (Tabs-Out) loaded with hi-fi Tape SKU12900 C-42 Red transparent screw GRUNGY (Tabs-Out) loaded with fox Tape SKU12898 C-45 Clear with Grey Liner (Tabs-Out) loaded with hi-fi Tape SKU12899 C-47 Red transparent screw GRUNGY (Tabs-Out) loaded with hi-fi Tape SKU12890 C-50 TONR GOLD SW (Tabs-OUT) loaded with HI-FI Tape SKU12901 C-73 Frost with Grey Liners and Screws (Tabs-Out) loaded with HI-FI Tape
A search box with auto-complete has been installed on all static pages. Content from the online shop can now be found on every page. Static pages will also be indexed and included in the search results.
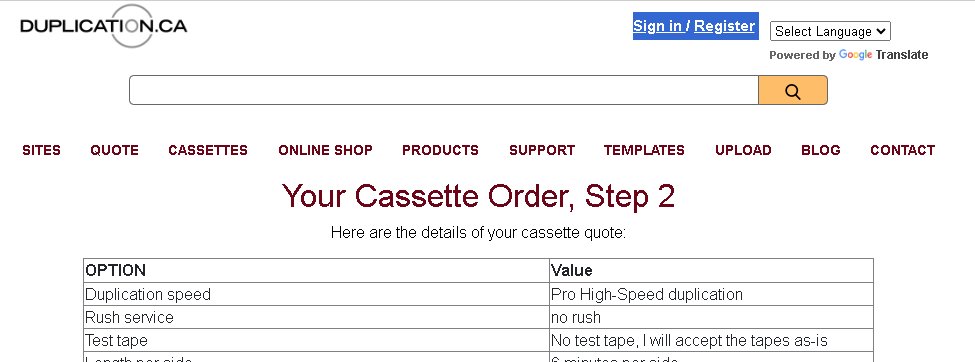
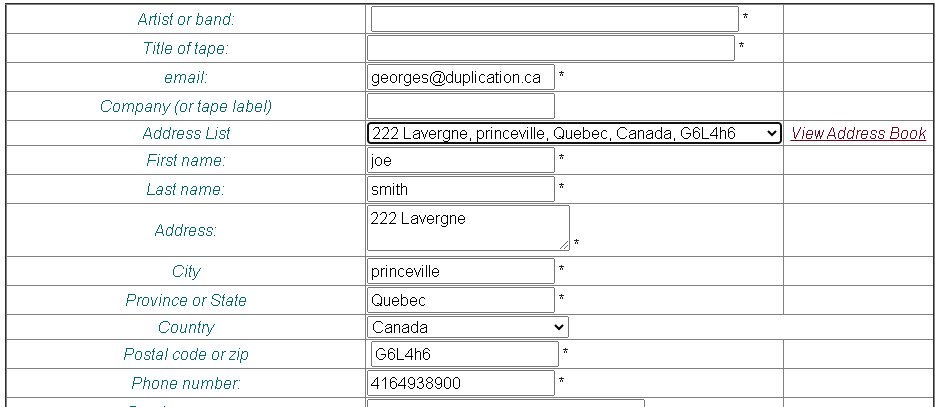
We have integrated the online shop address book into our popular duplication calculators! Now, when you’re entering a duplication or pressing order, sign in to get access to your address book. Here’s a few pictures showing how it works. First, sign in or register:
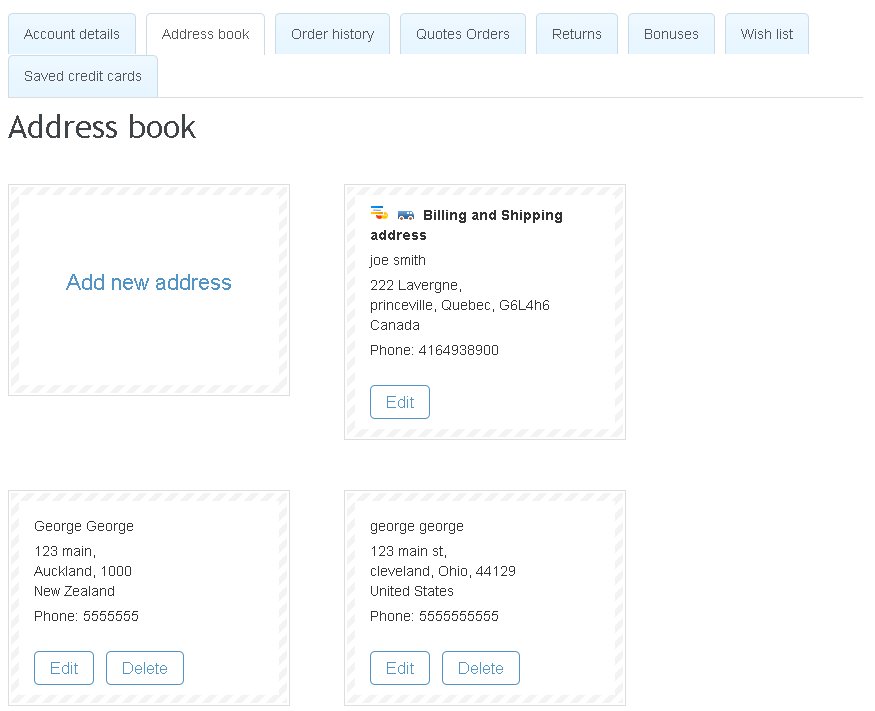
When you’re on the 2nd step, your addresses will be pulled from the online shop. You can also click on View Address Book where you can maintain your addresses.
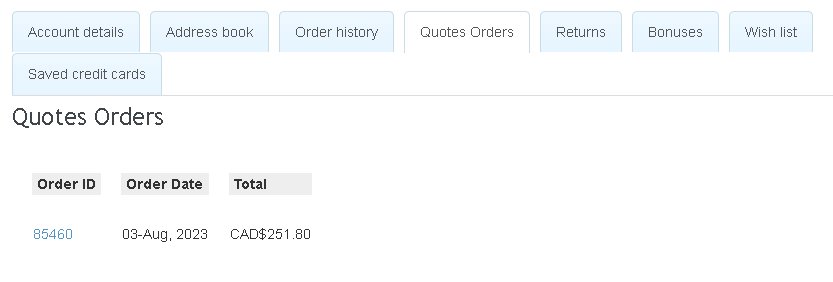
When you’re looking at your account in the online shop, there’s a tab to view your duplication orders under Quotes Orders. Only new orders will show up here.
Currently, only 1 shipping address can be chosen per order.
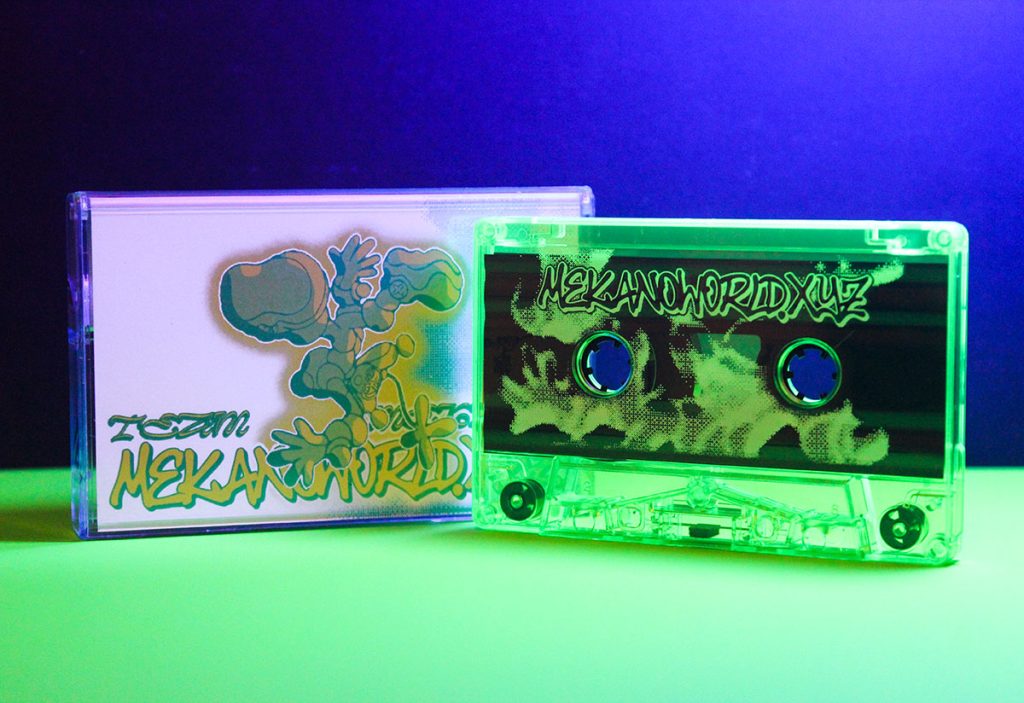
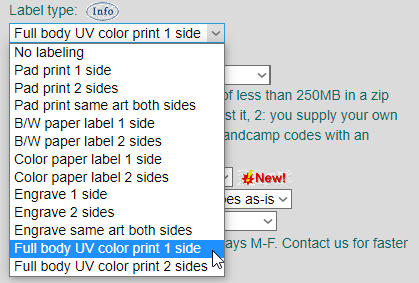
UV print has totally revolutionized how you can design your cassette releases. You no longer need to limit yourself to one or two colours, you have the entire CMYK spectrum to choose from when designing your masterpiece. Even better, with Full Body UV print you can design artwork on the raised edges and bottom hub area of the cassette shell, doing away with the constraints found in sticker labels and pad print! Our template includes knockout layers for the hubs and window, that way ink will not seep inside of the shell.
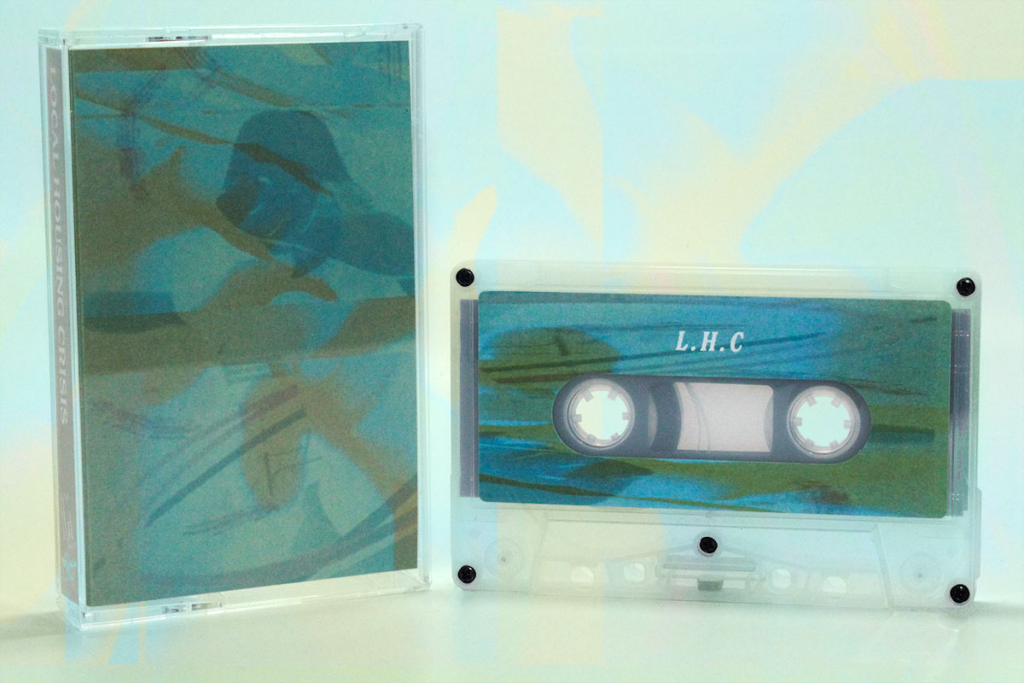
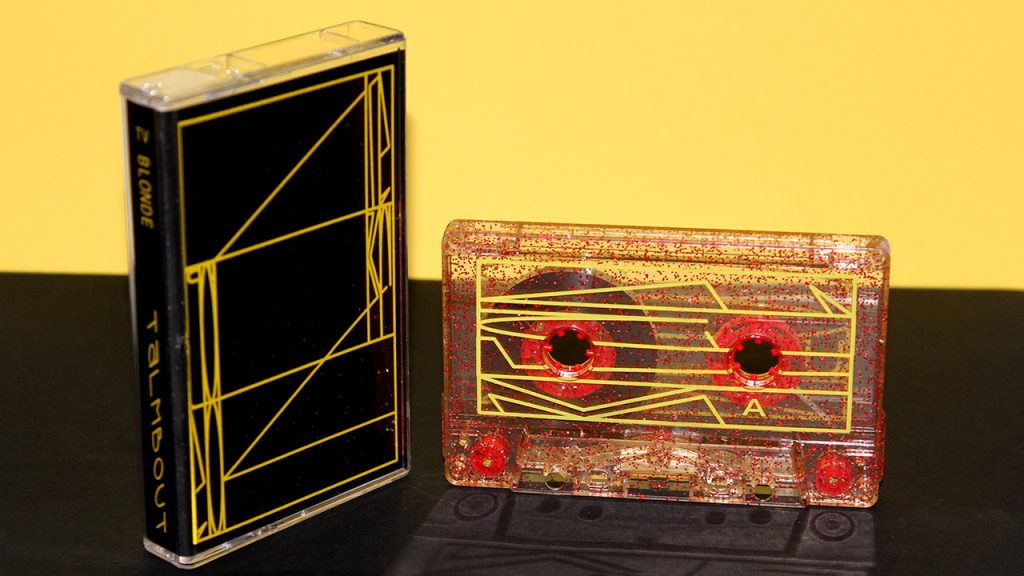
What makes UV print pop on cassette is the white base coating applied before your artwork, which stops the ink from being absorbed by the plastic shell, especially with darker shell colours. However, when you don’t apply the white base, you instead get a semi-transparent effect, wherein you can see the artwork but light can still shine through with transparent shells – very similar to stained glass!
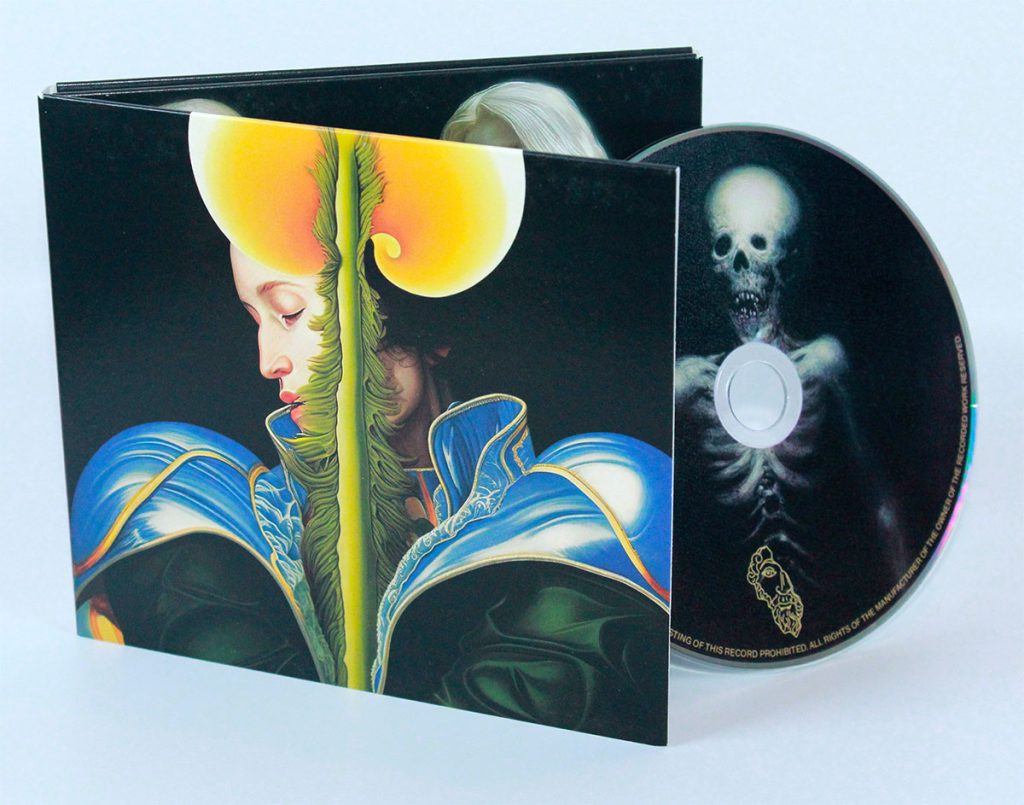
With transparent shells you can sidestep the white base coating to also achieve a visible reverse print. Here’s an example by Monster Piece, released by Sly Vinyl Records, where you can see the reverse image of the Side B artwork by looking through Side A. This gives a sense of perspective and distance, as if the moon is in the background and the howling werewolf in the foreground. The B-side will show the artwork in its correct orientation as provided by the artist.
Omitting the white base coating for a stained glass effect or reverse print is available by request! Just add UV Full Body print to your cassette order and let us know your desired effect in the ‘notes’ section of your order.
When you put in a cassette order you want the finished product to look its absolute best. Following these steps not only makes our job easier, but it will ensure that your pad print will look just as gorgeous as intended. First you’ll need to place your order on our cassette duplication calculator, then we can get started!
DESIGNING YOUR ARTWORK
1) Download our latest template
There are a few things to consider when designing pad print artwork for your order. First, what kind of shell have you chosen? Our templates have layers for opaque tapes, clear/windowless, and shells with square hub windows.
Each template has useful information about designing artwork that is unique to each type of cassette shell chosen, so be sure to check if we have updated templates available with every order and follow the directions contained in the file!
2) Applications
First and foremost, we highly recommend you send us vector artwork, so you should be using applications such as Adobe Illustrator or CorelDraw to design vector logos and line text. Graphic design applications such as Adobe Photoshop or GiMP can be used, but bitmapped images will be subject to additional fees.
MEET THE MINIMUM REQUIREMENTS
1) Vector Artwork
We now require vector artwork for pad print. It helps us achieve finer lines with a fraction of the platemaking time. It’s best to create artwork as a vector image, but we recognize that sometimes images are sourced from bitmap files or hand drawings. Outside of CorelDraw and Illustrator, there are freeware websites that allow you to upload your image and they will trace the outlines to convert to a vector file. The results will vary and often depend on the complexity and quality of your source material. Some websites have more options than others, so be prepared for trial and error tweaking until you’re satisfied. Further tweaking can be done in programs like Illustrator, PhotoPea, or even Photoshop.
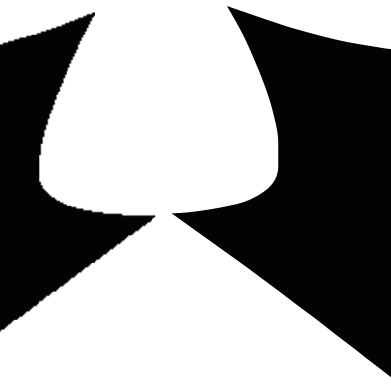
Difference in quality between bitmap (left) and vector (right)
If you cannot retrace your images or convert to vector, we will be able to do it for a small fee. Bitmap images are also subject to a fee as they can take up to 20x as long to print the plate.
2) Grayscale
Regardless of your chosen ink colour, make sure your artwork is done in black. If you requested 2-colour pad print you’ll need to have each colour artwork in its own layer. The layers should be properly titled with their colour name (ex. one layer would be titled ‘Red’ and the other ‘Blue’). Again, regardless of the desired ink colour, each layer artwork must appear black.
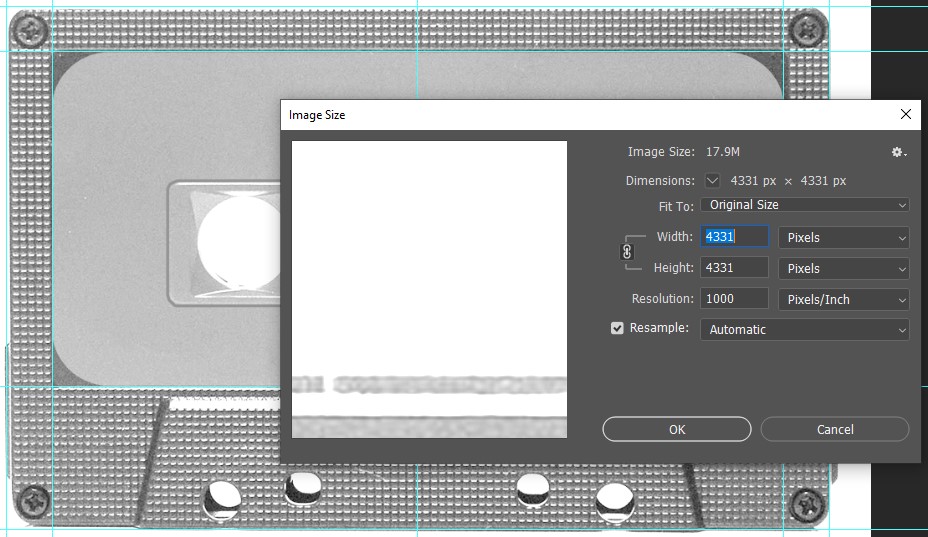
3) Resolution
A low resolution can cause the finished product to look pixelated and of poor quality. If you are using Photoshop or your own template, ensure the dimensions and resolution are 4331 x 4331 pixels wide at 1000 ppi. Please note that resolution isn’t applicable when working with vector art.
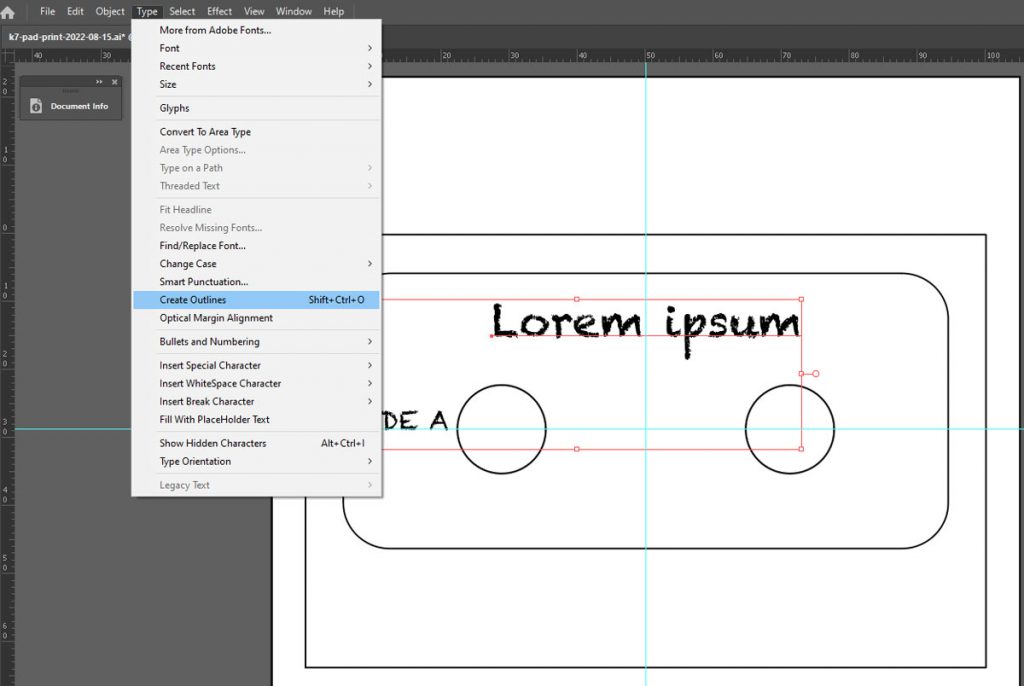
4) Creating Outlines for Text
Often times we will receive a file with missing fonts, which means your meticulously curated typeface design will revert to a basic font style when we open the artwork file. But there’s an easy solution to this– simply Create Outlines for your text!
All you need to do is select your text, then navigate to the Type menu and select Create Outlines. The same can be done in Photoshop by selecting your text with the Direct Selection Tool and clicking on Convert to Shape in the Type menu. Avoid using faux font styling as it may not convert properly.
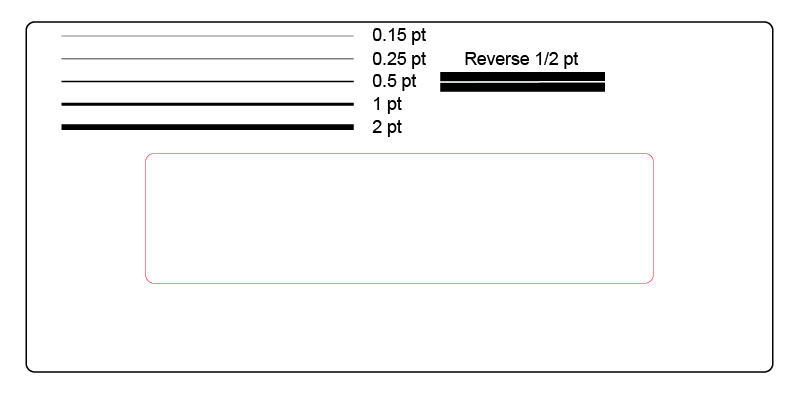
5) Line Thickness
When you’re designing your artwork, you’ll want to keep an eye on line thickness. In order to ensure that your art will be visible when printed you’ll want your artwork lines to be at least 0.15 points thick. This is about the equivalent thickness of very fine hair. Anything less than 0.15 points risks not being visible on the final printed cassette. This applies to text as well.
Moreover, the knockout, gaps, or empty space between artwork also has to be a minimum of 0.5 points thick to properly print, otherwise there is the risk of ink running and filling up the empty space. Please make sure all empty space is at least 0.5 points thick to avoid spreading ink.
Zooming in shows that the select horizontal area is 0.1 points thick.
An illustrated breakdown of line thickness.
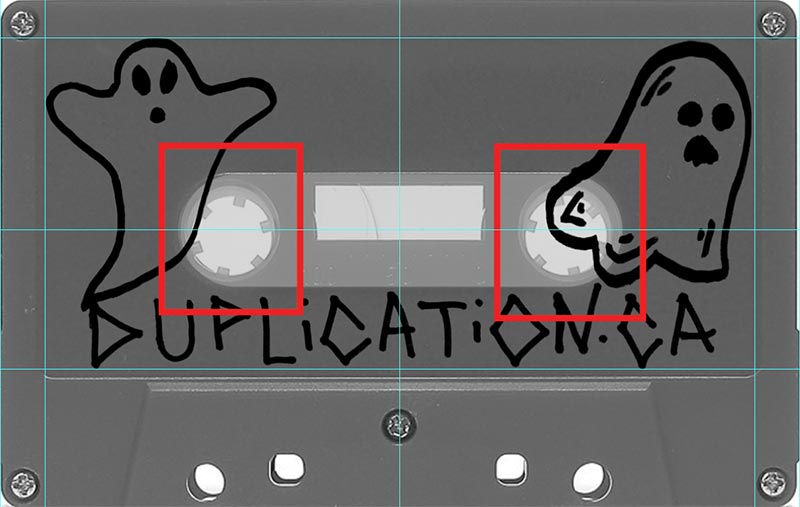
6) Mind the Gap
Depending on the type of shell you have chosen, there are areas you cannot print on. For example, there are two holes in every cassette shell which obviously cannot be printed on! Solid coloured shells, certain select clear shells, and square window shells have a recessed window in the center which can distort artwork, especially text. If you are uncertain about the type of shell you have chosen for your artwork, contact your sales representative!
An example of areas where the artwork will not print.
7) Tell Your Sales Representative
Make sure that your sales representative knows exactly what your order needs, as there may be a price difference. If you want the A and B sides printed, it is “pad print two sides” on the cassette duplication calculator. If you just want the A side printed, it is “pad print one side.” If you’d like the exact same art on both sides, it is “pad print same art both sides.“
Once your artwork is complete and uploaded, let your sales representative know! They will double check your artwork to make sure it is compatible before sending it through to our pad print department. If you have any questions, be sure to reach out to them! They are happy to help!
The website uses cookies to allow us to better understand how the site is used. By continuing to use this site, you consent to this policy. Click to learn more.


")


